
If you are thinking, “I need a website by the end of the day, not the end of the month,” then you are in the right place. You might only need a one-page site for launch, profile, event, or even client demos. Strikingly is designed for this; choose a template, replace text & media, then publish!
In this guide, you’ll learn how to do it, with tips & tricks along the way for first-time builders, developers, and agencies.
Is Strikingly the right tool?
Strikingly shines when you require a nice, simple scrolling page to have a few sections, i.e., hero, benefits, and contact form. You probably do not want this for a large multi-page website or something with a lot of customisation.
That aside, if your project fits on one page, keep reading.
What you’ll need before you start
- A rough outline of your sections
- Your logo and 3-5 good photos
- Brief copy for your headline, offer, and contact information
- A domain name: If you would prefer not to use the free subdomain.
- About an hour
Step 1: Create your account and pick a template.
Sign up on Strikingly and start a new site. Select the option most similar to the one you want to build and select a template. Feel free to add your details. Just grab an option and run with it. Everything is easily changeable, so pick what is most similar to your vision.

Step 2: Plan your sections.
Before you start editing, examine the page’s purpose. Here is a reliable one-page structure:
- Hero: one clear headline, one supporting sentence, and one button
- Benefits: three or four reasons to care
- Proof: testimonials, logos, or a brief case study
- About: your identity in a few words
- Offer or pricing: what happens next
- Contact: a form or a button
Remove or delete any sections the template adds that you don’t need in your design. Shorter pages usually convert better.
Step 3: Edit your content.
Click on any text to edit directly. Let visitors quickly learn what they will get from you, not what you do. Keep each section to one idea, and start each one with the benefit to the visitor.
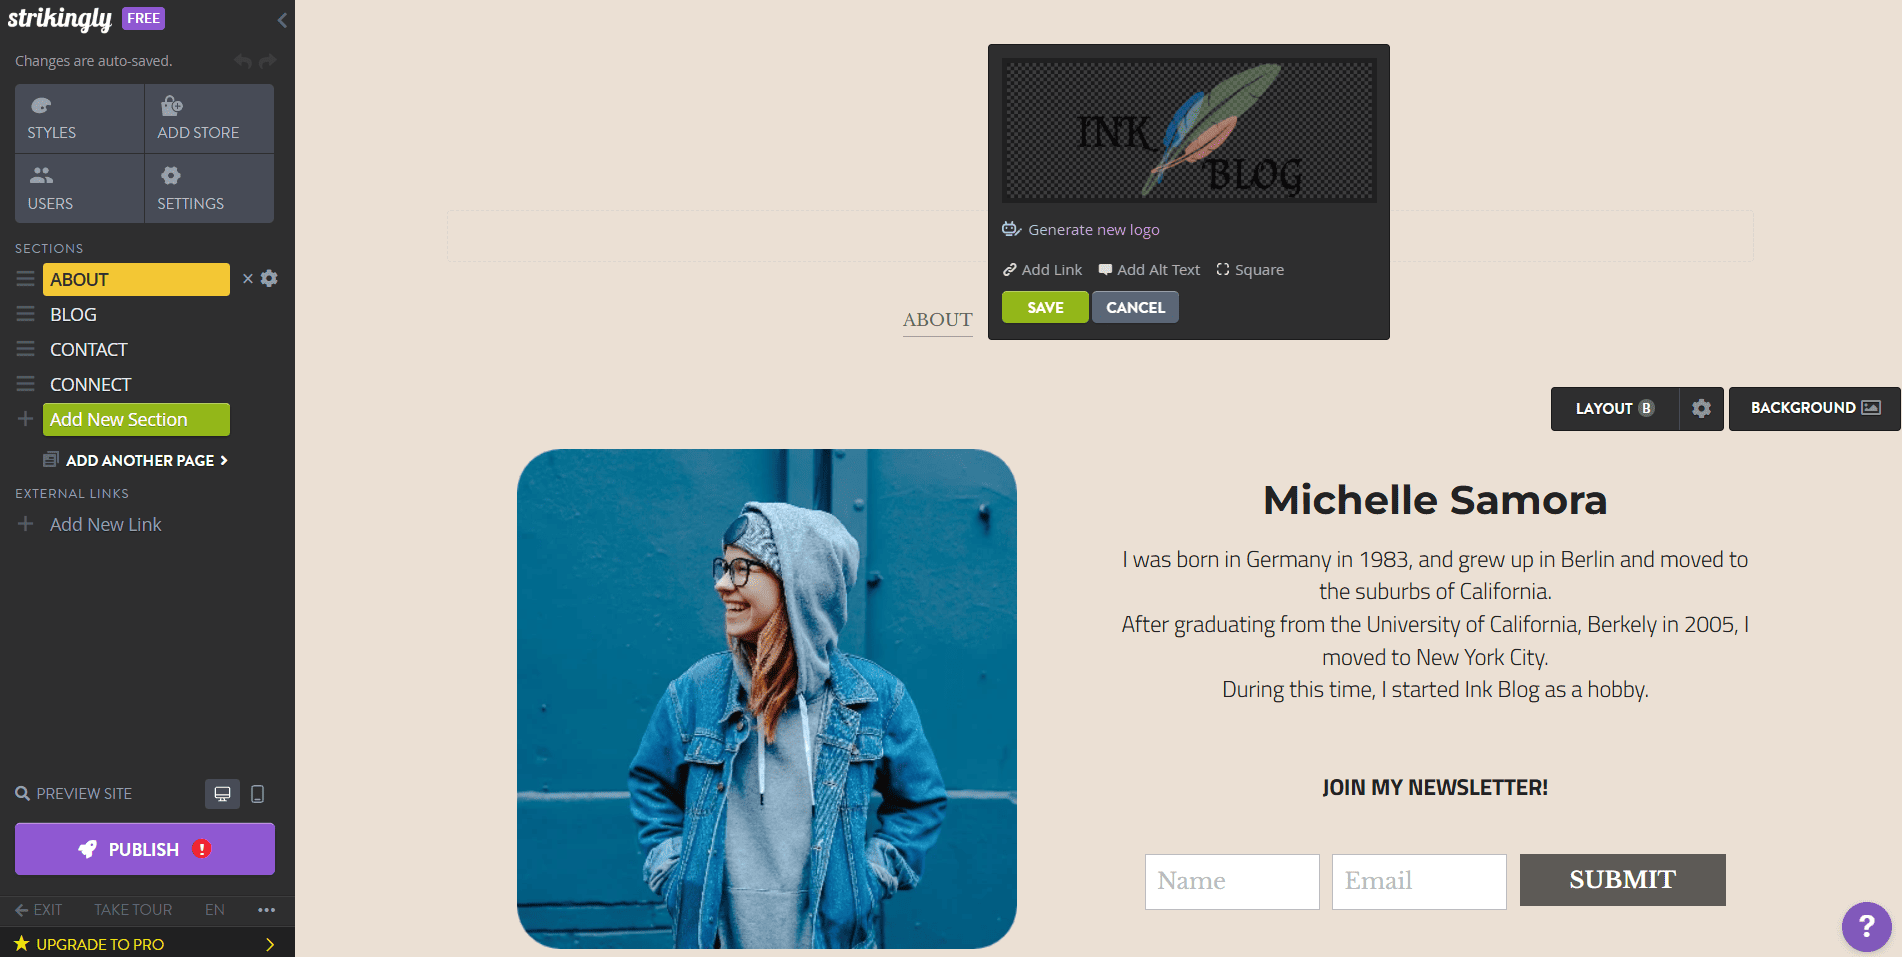
Replace placeholder images with your own, and compress them first (recommended) so the page loads quickly.
Give each section one main call-to-action button, and make that button tell them what will happen when they click. Book a call! That’s better than “Submit”.
Step 4: Set up navigation and forms.
On a one-page site, the menu scrolls to sections. Limit the number of links to four or five at most, and place a button in the header for your main call to action.
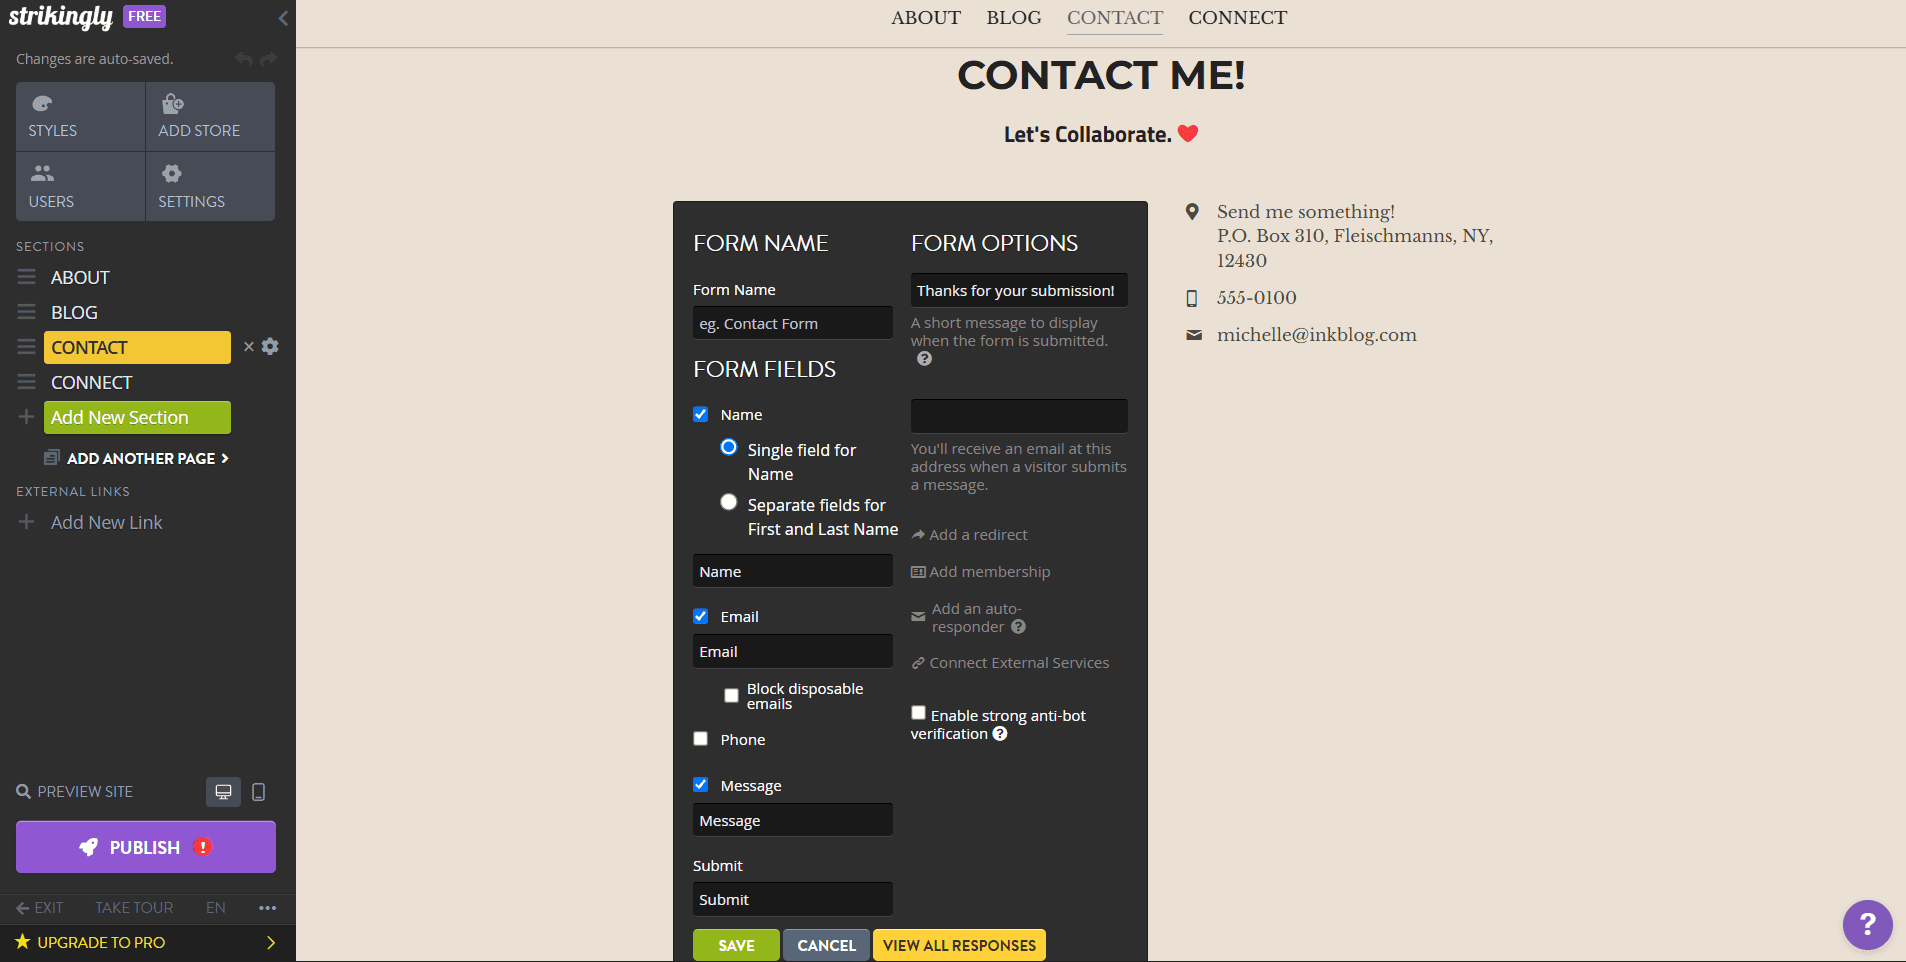
Add a contact form and send a sample message to yourself so you know it arrives. Some form and integration features are on paid plans, so check before building around them.
Step 5: Tune the basics (SEO and mobile).
- Use the SEO settings for a page title and meta description by rephrasing your primary keyword into natural language.
- Add alt text to images.
- Preview on phone & tablet – text size, button gap, and long headlines
- Check your page speed with a free tool and resize large images.
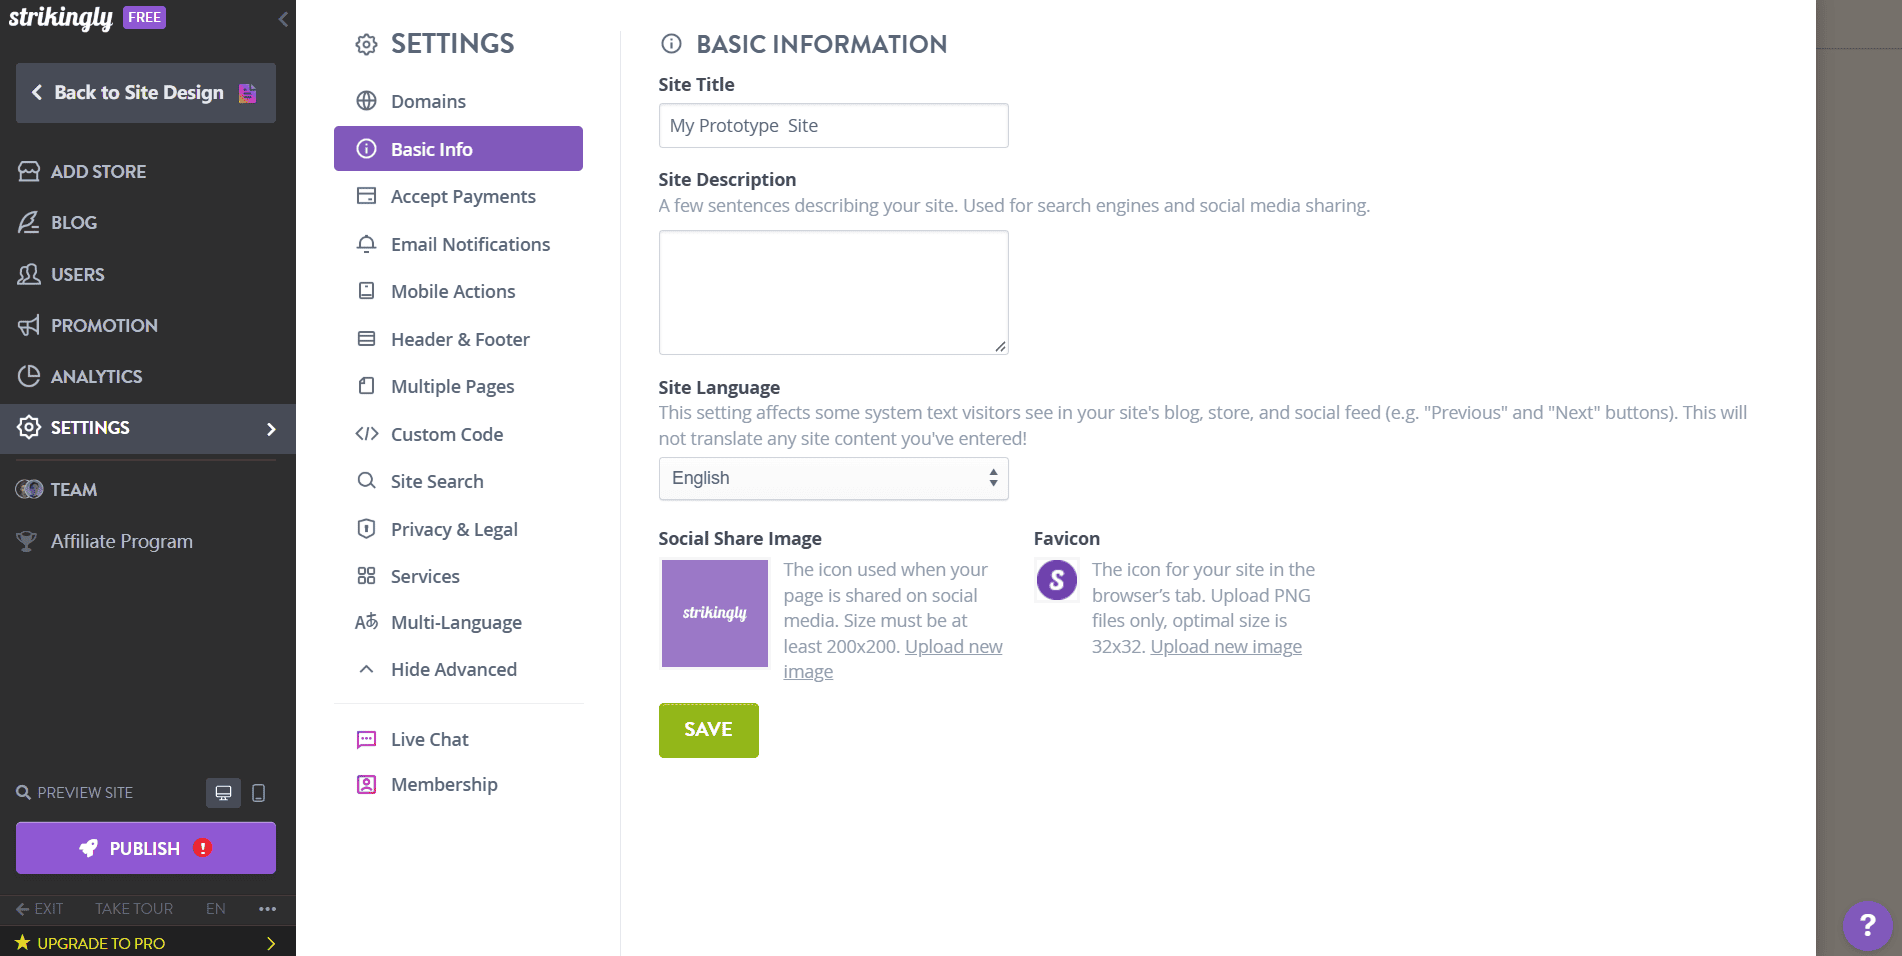
Step 6: Connect a domain and publish.
You could publish on a free strikingly.com address, which is what I do when I’m playing around and for sharing straight away. But for anything more serious, add your own domain (which requires a paid plan).
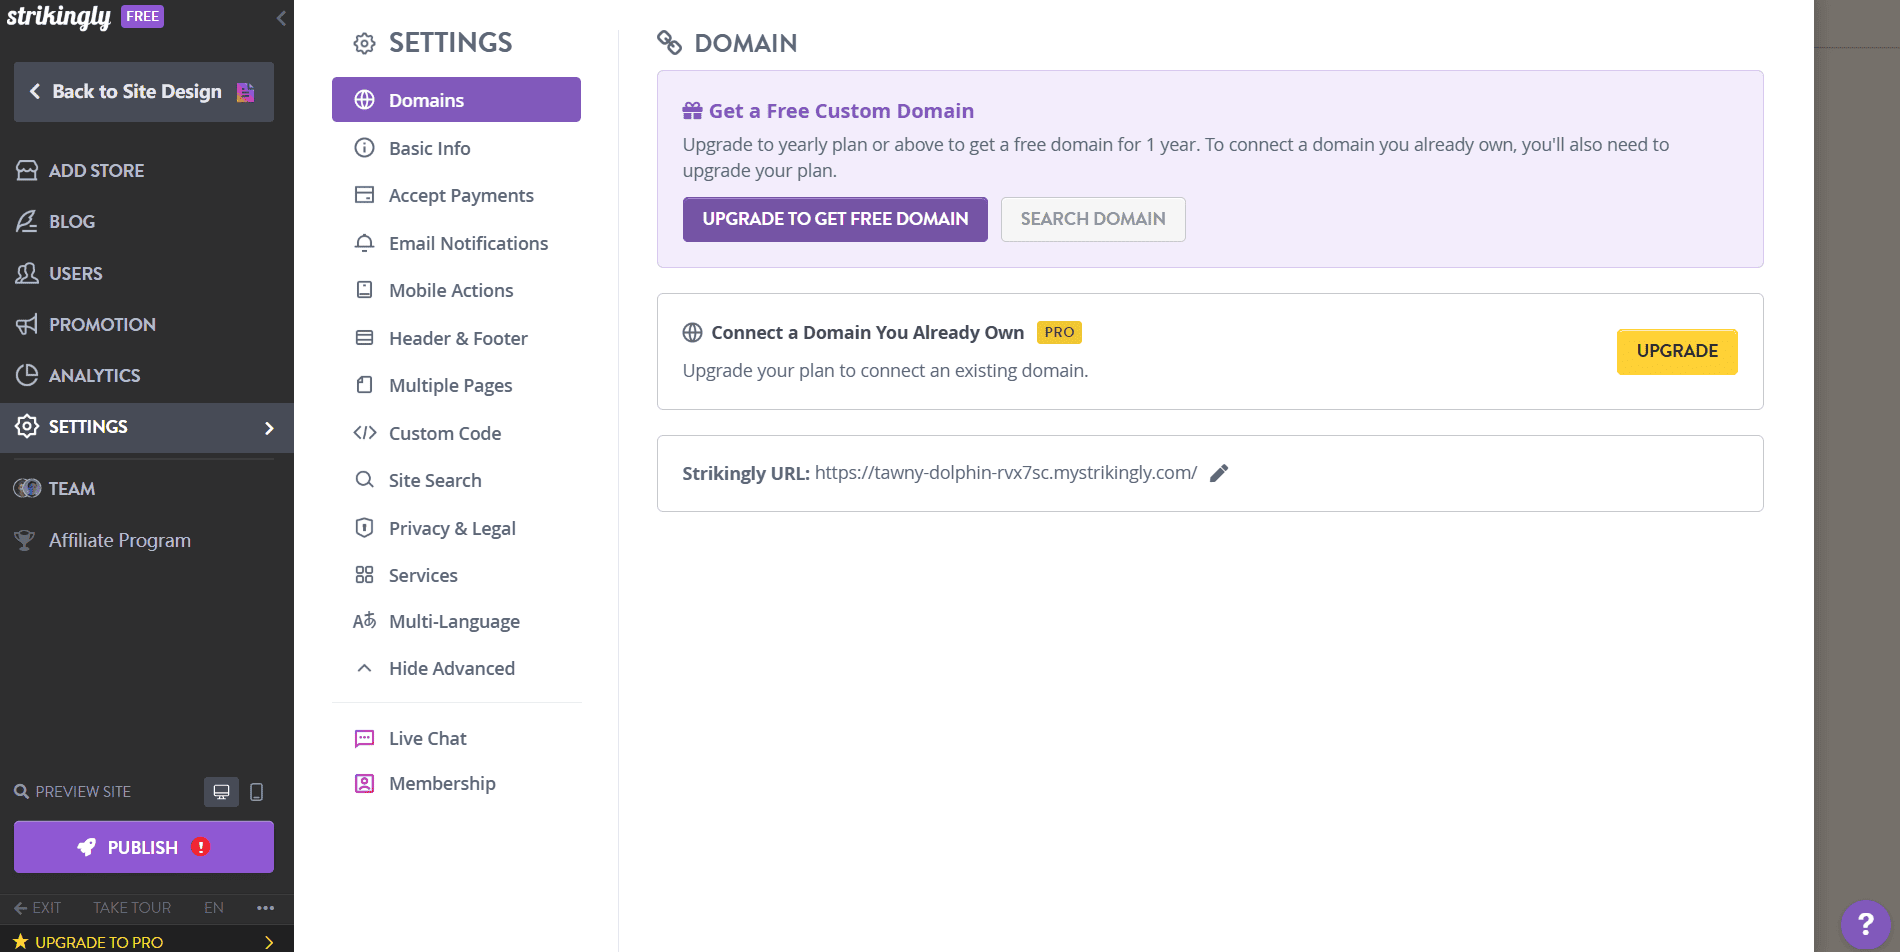
Follow the Strikingly instructions for your domain, then wait a few hours while the DNS propagates. Once your site is live, open the link on your phone and check it out.
Step 7: Check results and improve.
Post-launch, view your website analytics and identify where users leave your site. Experiment with changing elements (i.e., button colour or headline; section 1 in your business plan becomes section 3 on your website) one at a time.
If you’re using a one-page website, it won’t take you long!
Which plan do you need?
- Free: Perfect for practice and hot sticks and quick trials, but you have a Strikingly address
- Paid plan: use your domain and additional bandwidth
- Higher plans: usually required to take away Strikingly branding and importing customised code or fonts
Plans and prices change, so check the pricing page before you commit.
Tips for beginners
- Use a template and just alter a few things. Choose two fonts and three colours.
- Try it on the free plan! No charge for anything.
- Read your draft out loud. If it doesn’t sound natural, make it so.
- Show the page to a friend for five seconds and ask what it’s about.
Advice for experienced developers
- Its builder is no-code, so you should always presume a rigid layout. Custom code and font uploads are generally only available on higher plans.
- Embed blocks for analytics, chat widgets and tracking scripts.
- Don’t fight the editor. Want pixel-perfect design or custom interactions? The coded site will be quicker than finding a workaround.
- Ideal for lightweight landing pages and microsites, where speed reigns over flexibility.
Tips for agencies prototyping
- Present clients with a functioning prototype in a single day – before you invest in a full build.
- Copy an existing site as a template to begin the next project.
- Show the live link for feedback, not mockups. Actual scrolling & the live mobile view are better than screenshots.
- Be clear about limits: one page/structure, branding on lower plans, and cost of plan.
- Rebuild in a custom stack if it is too big for Strikingly after you get the green light.
Common mistakes to avoid
- Cramming in too many sections, which dilutes the message
- Using several competing buttons
- Uploading large, uncompressed images
- Skipping the mobile preview
- Forgetting to test the contact form after publishing
Final thoughts
Strikingly’s greatest strength is that it isn’t trying to be everything, and that is kind of the whole point. Strikingly is quick and easy for a single-page small site that also checks all the boxes with almost no grief or effort.
Beginners get an easy project, programmers get a quick way to deploy something simple, and agencies get a proof of concept in no time.
Ready to try it? Click here to try Strikingly for free